Google Cloud Storage
In order to let BeOp push you periodic reports in your Google Cloud Storage (GCS) bucket, you need to create a Service Accounts for us and configure the access to your bucket.
Buckets are the basic containers that hold your data. Everything that you store in GCS must be contained in a bucket. You can use buckets to organize your data and control access to your data.
A Service Account is a special type of Google account intended to represent a non-human user that needs to authenticate and be authorized to access data in Google APIs. Below are the steps to create and use a Service Account.
Step 1 — Create a Service Account and its private key#
1a#
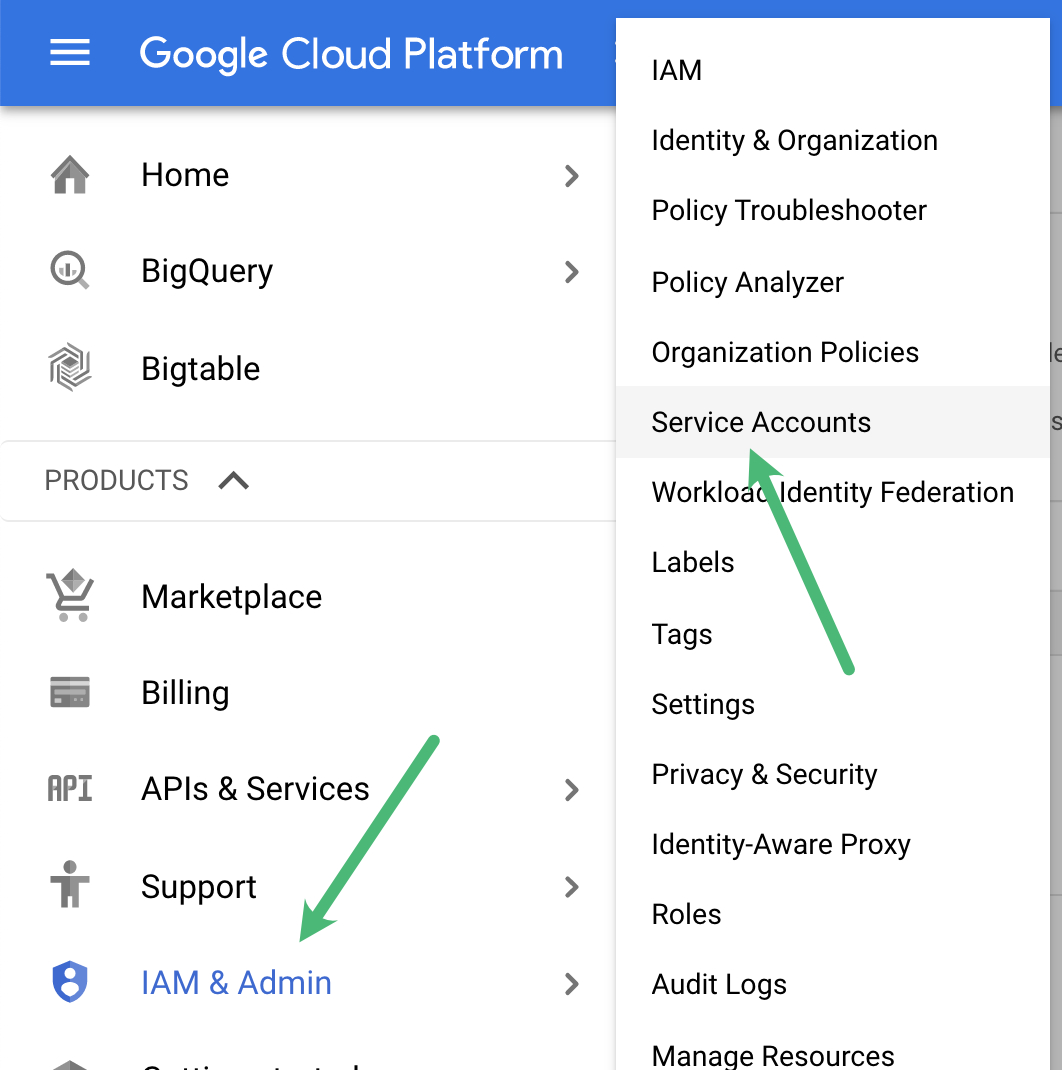
In the Google Cloud platform console, go to "IAM & Admin" and then the Service Accounts page.
1b#
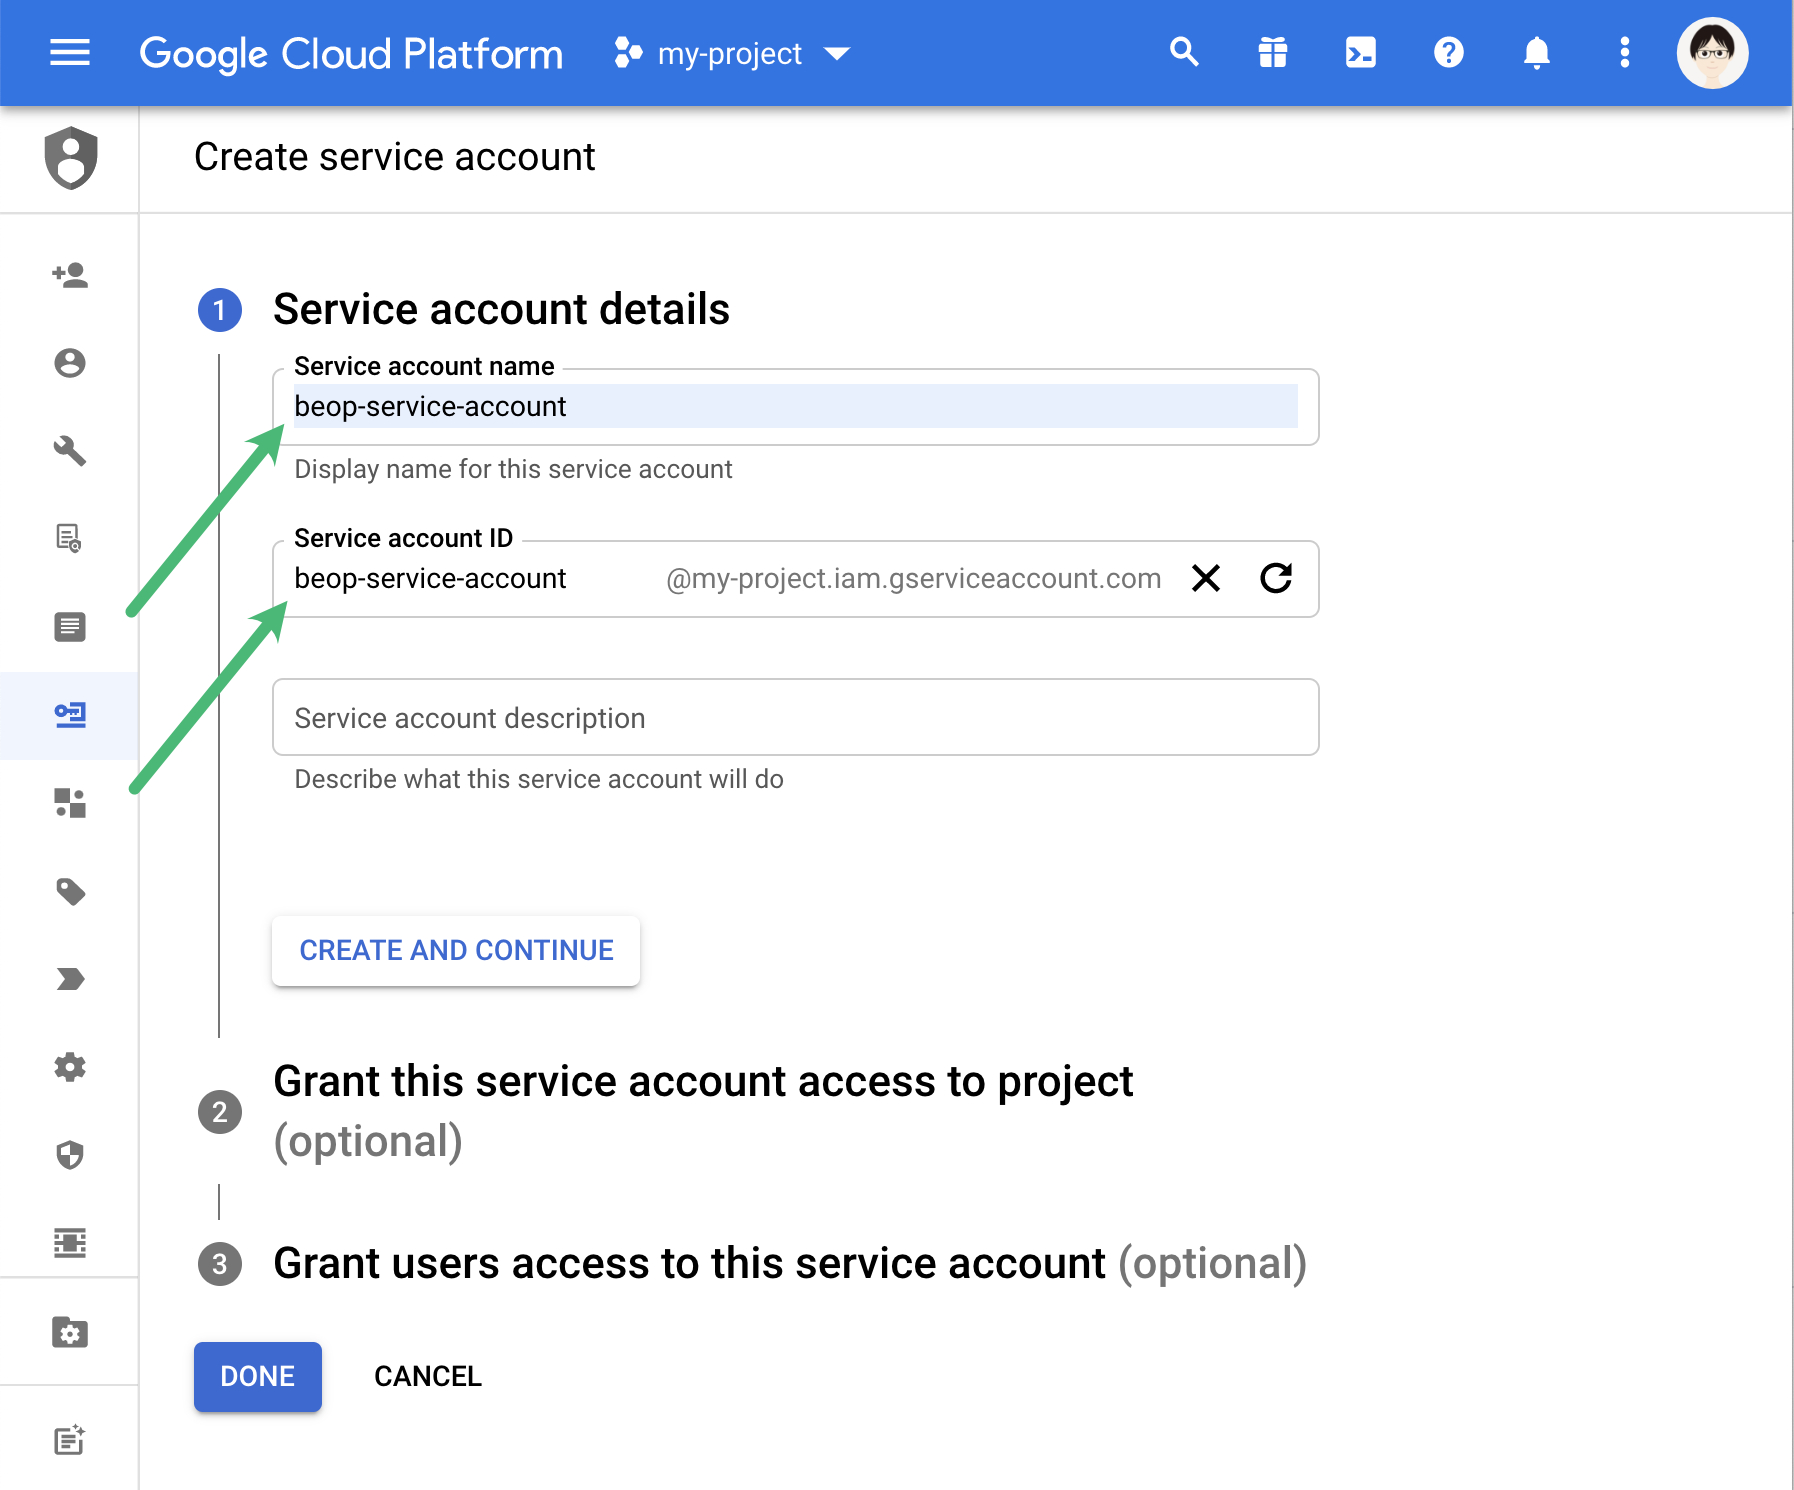
Fill in the name, for instance beop-service-account.
Remember the email generated for you, you’ll need it later (step 2b).
1c#
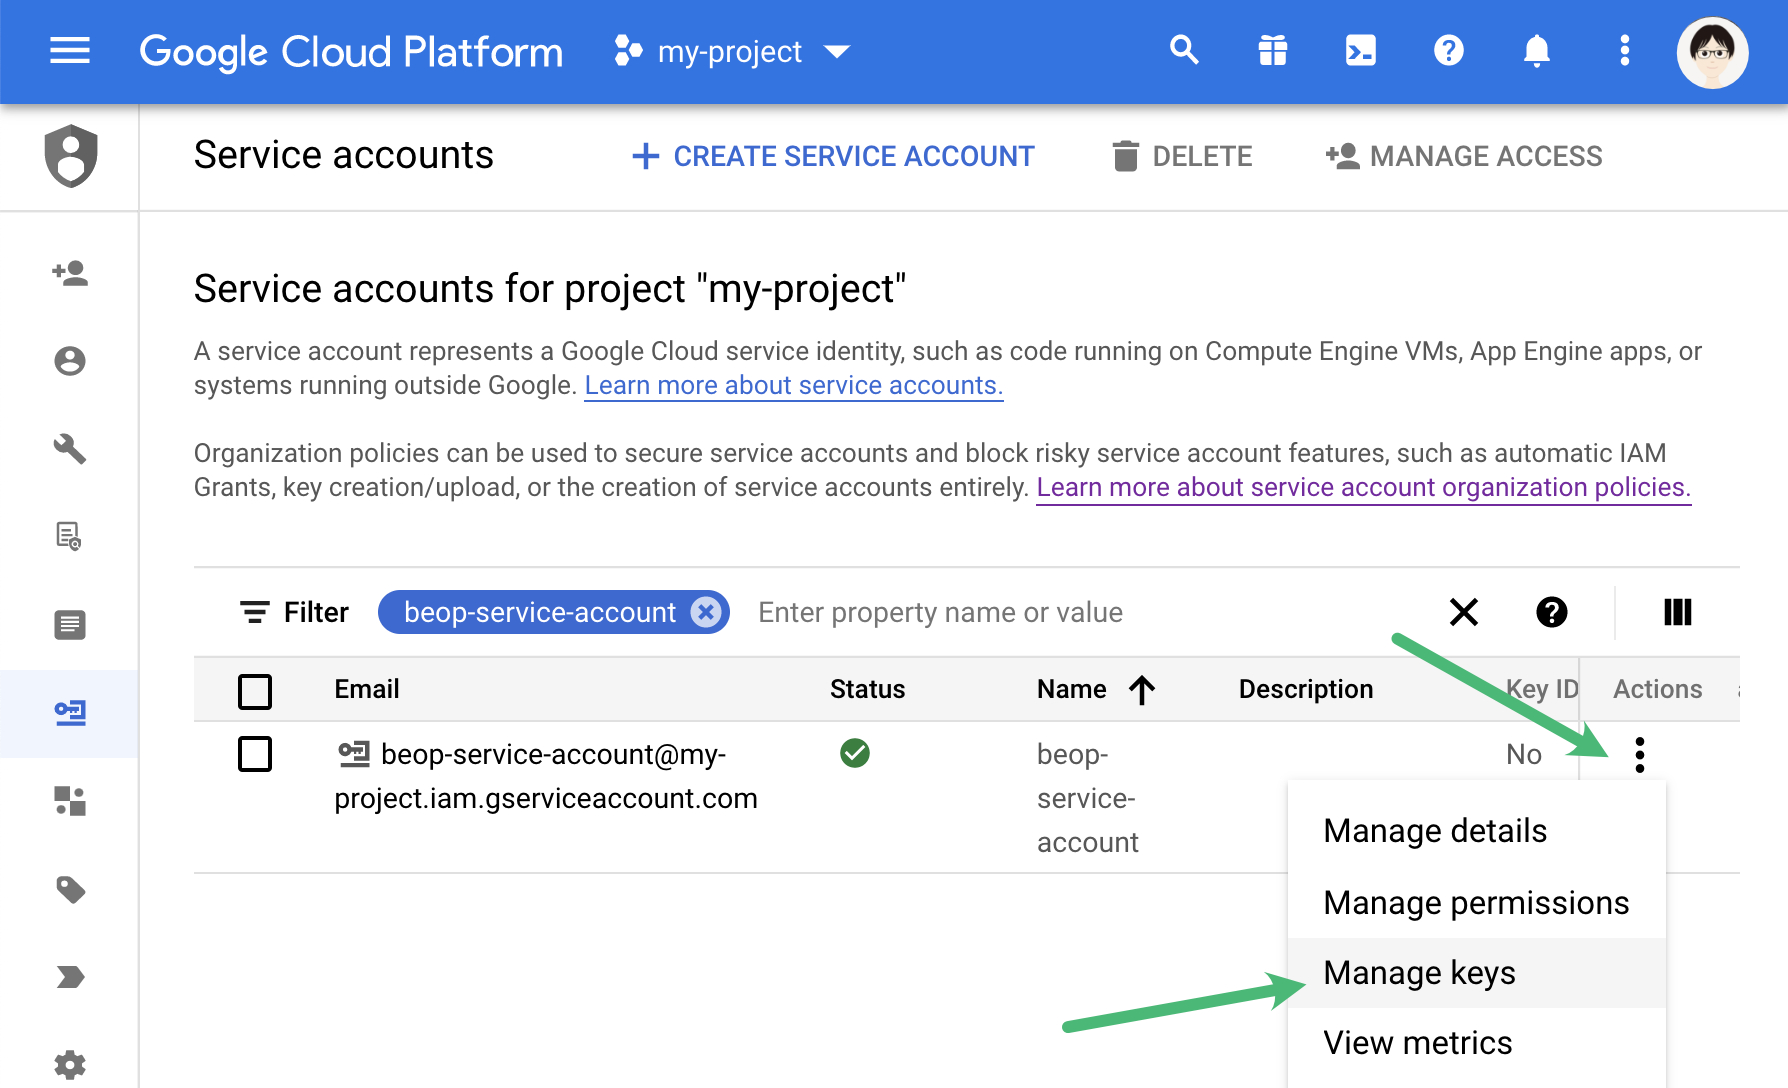
On the account we’ve just created in the list of Service Accounts, select “Manage keys” in the Actions menu.
1d#
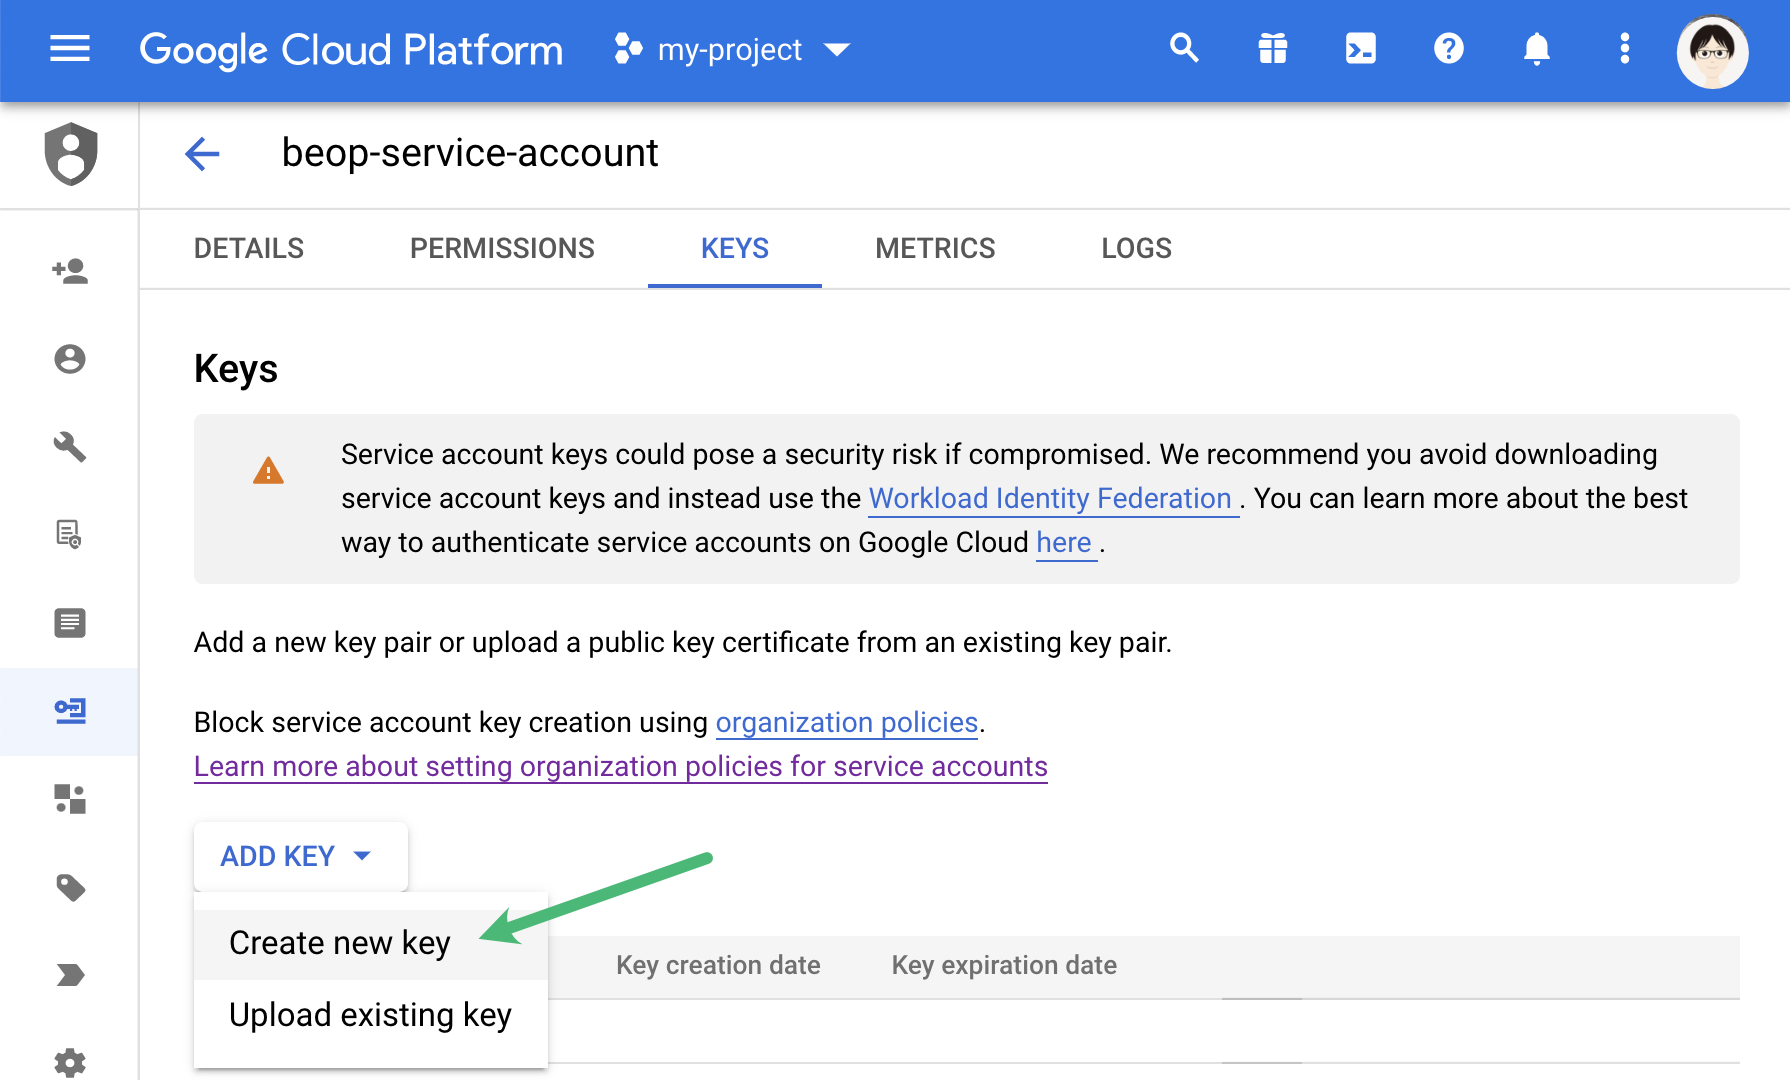
In the “add key” select button, select “Create new key”
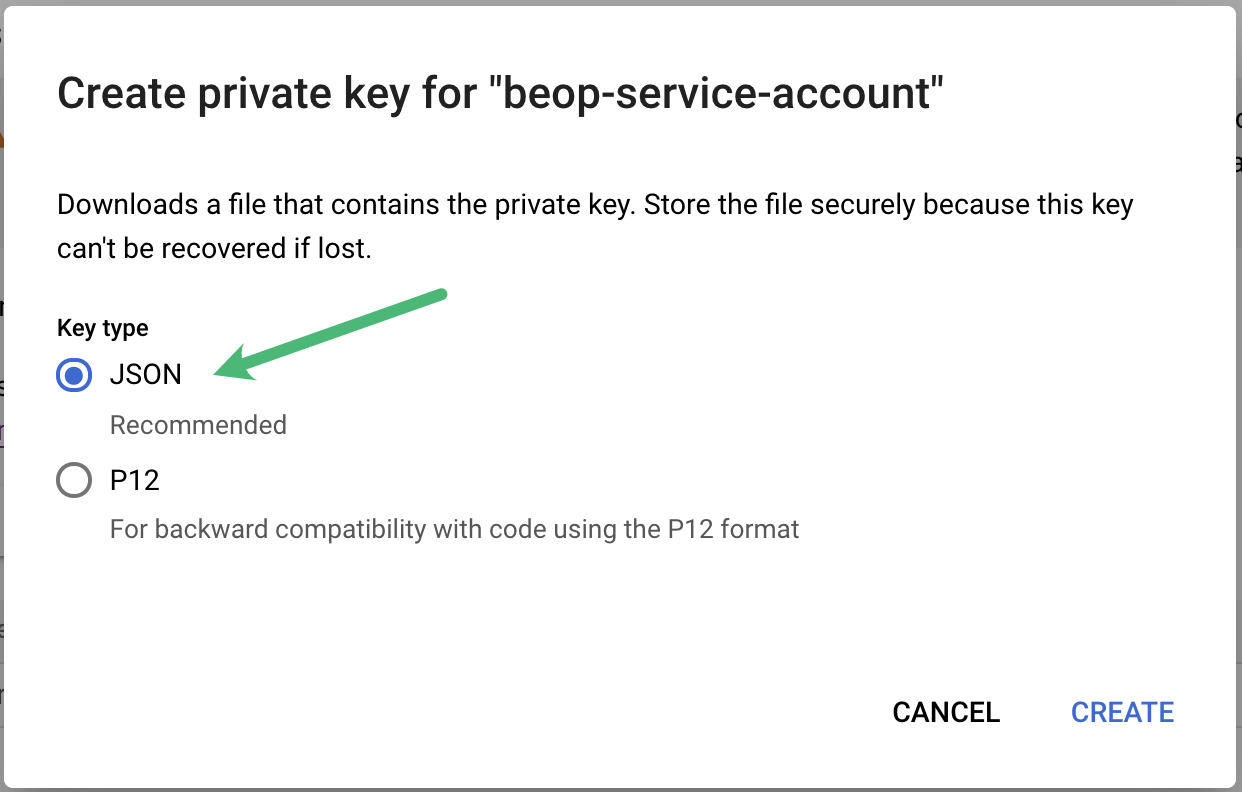
1e#
Select the JSON key type and download the key, it’s the one you’ll specify in the BeOp dashboard
Step 2 — Set permissions#
We assume you’ve already created a storage bucket to contain the future BeOp exports (for instance, beop-exports). If you need help to create one, Google has a help page.
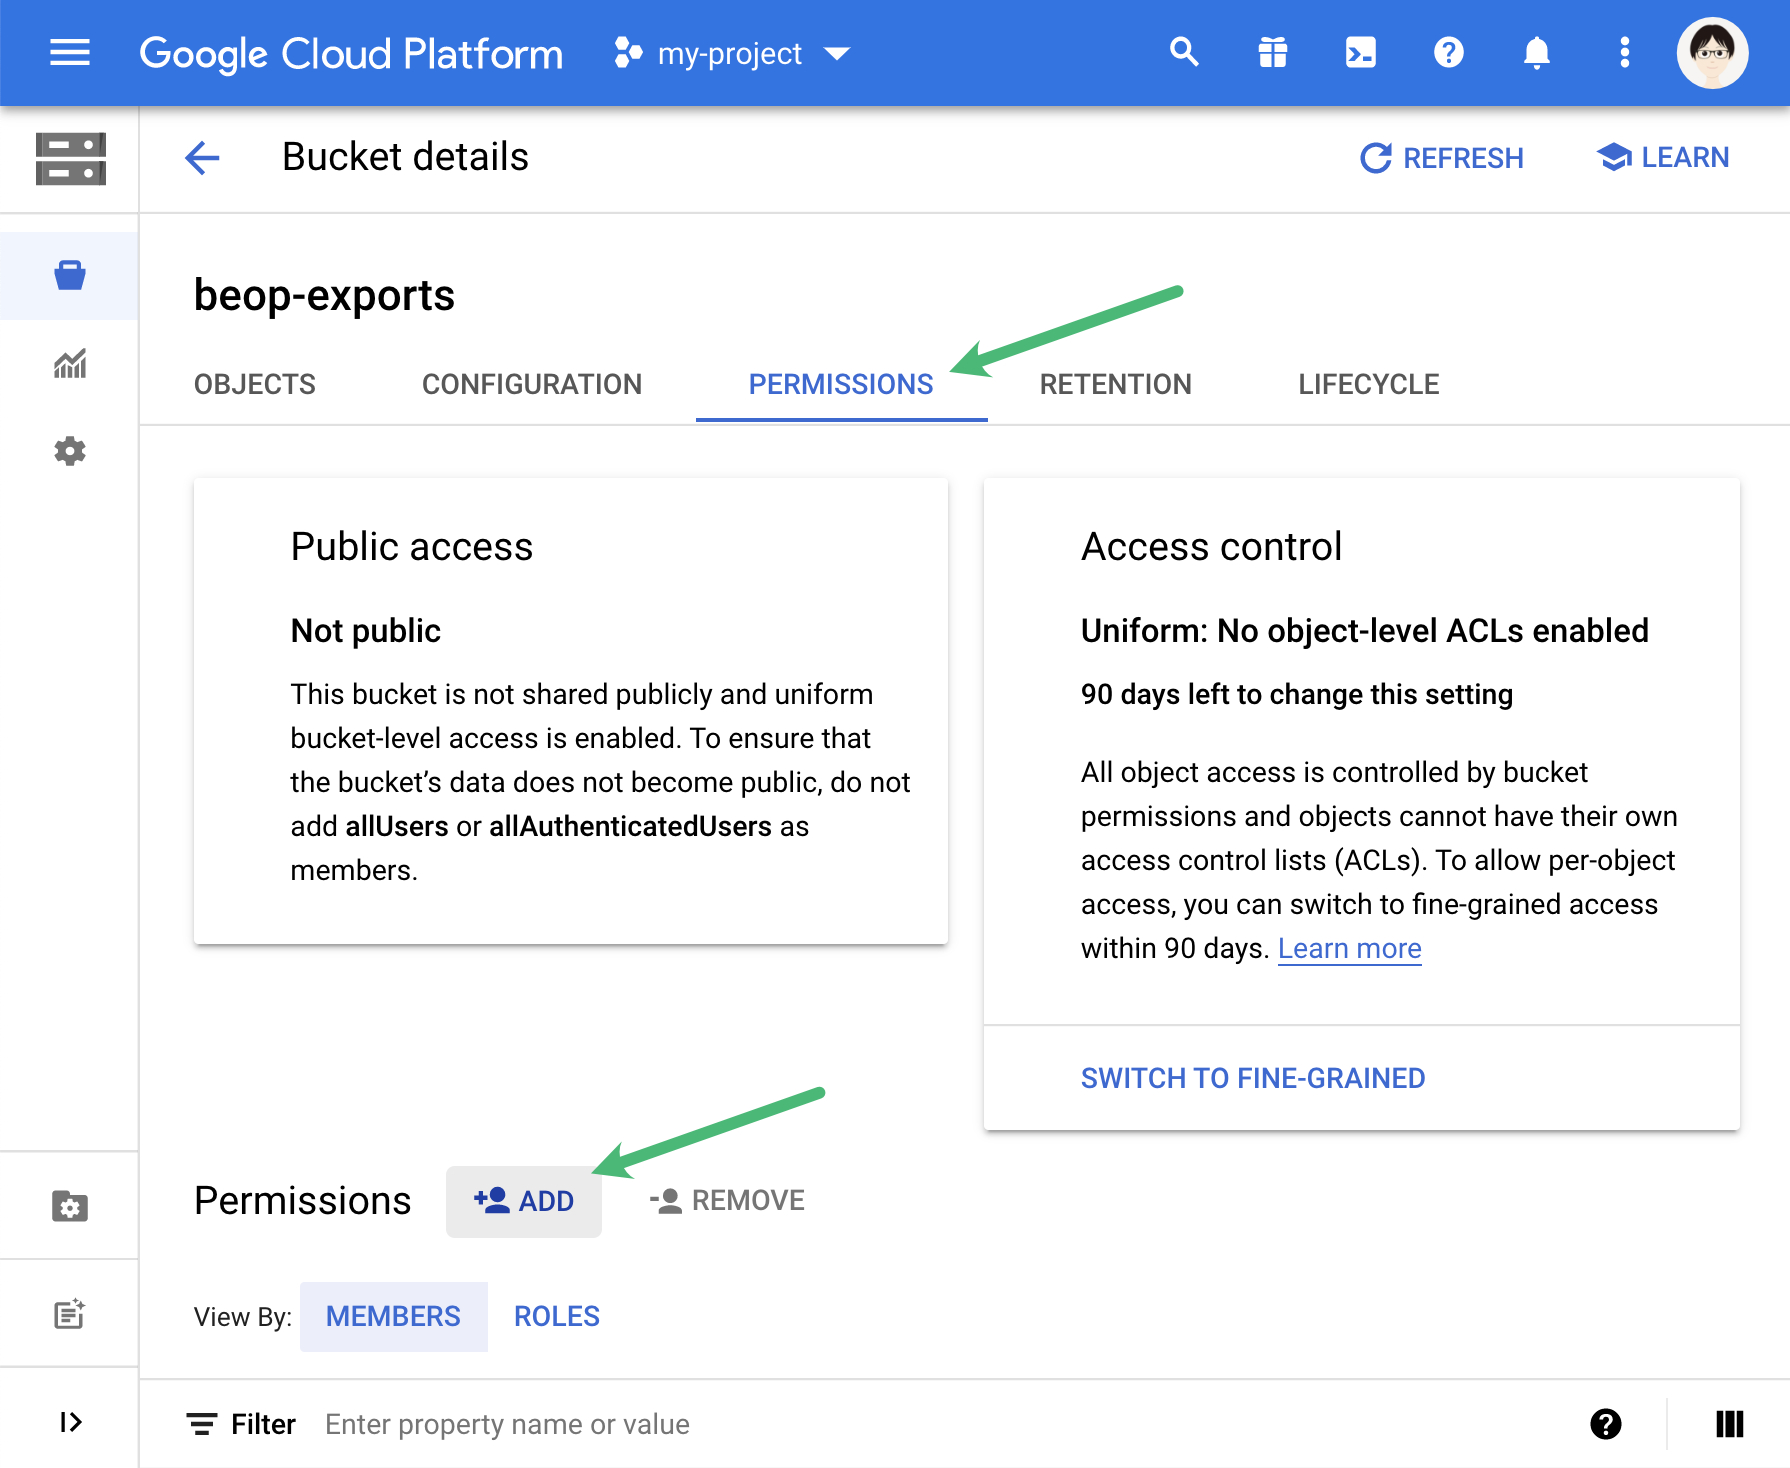
2a#
In the “Permissions” tab, click on the “Add” button at the bottom.
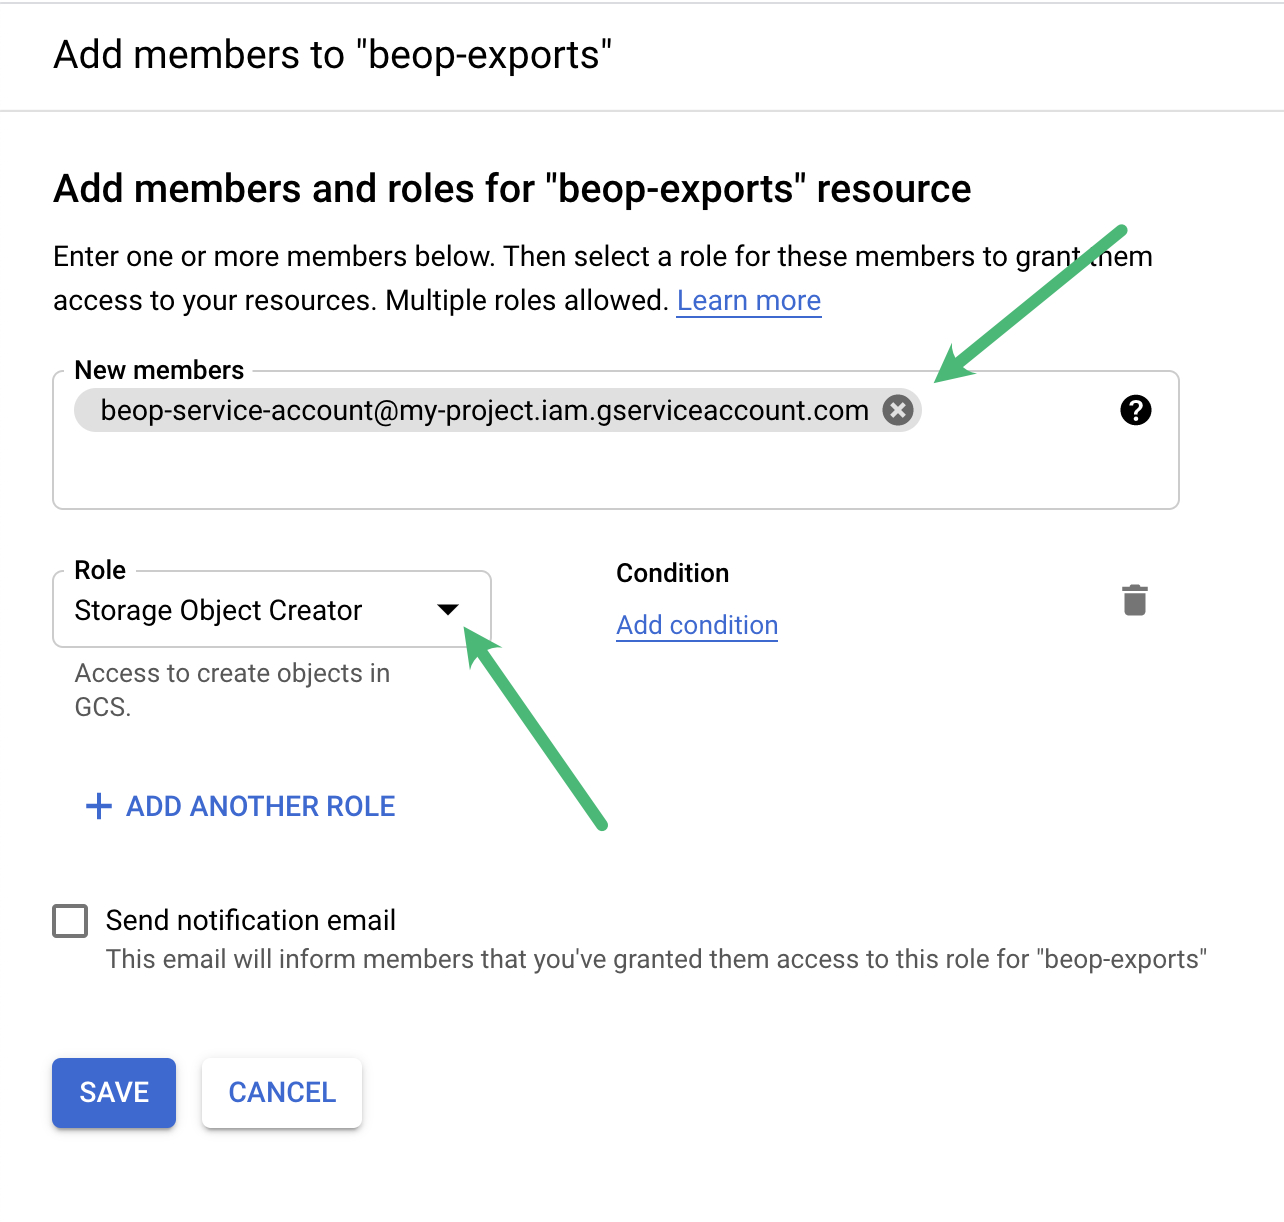
2b#
Specify the email of the service account you’ve created in step 1b.
Then choose “Storage Object Creator” as the role; it allows us to write our exported files in your bucket, and nothing more.
Step3 — Done!#
You can go back to your BeOp dashboard, and specify in the configuration of your exports
- the bucket name (in our example,
beop-exports) - the credentials key as obtained in step 1e.