AdServing Campaigns
Unlike classical campaigns, "adserving" campaigns are really poor in terms of settings
- No audience
- No budget
- No targeting
- No flight dates
- No limits or cappings
The adserving campaigns are here to always be displayed when someone is asking for it somewhere. Consider it to be a way to use BeOp formats outside of BeOp inventory. Thanks to these campaigns, you will be able to display BeOp campaigns directly into your own Ad Servers or classical DSP.
Setup#
If you have access to that type of campaign, you will be able to select it at the really begining of the campaign creation process
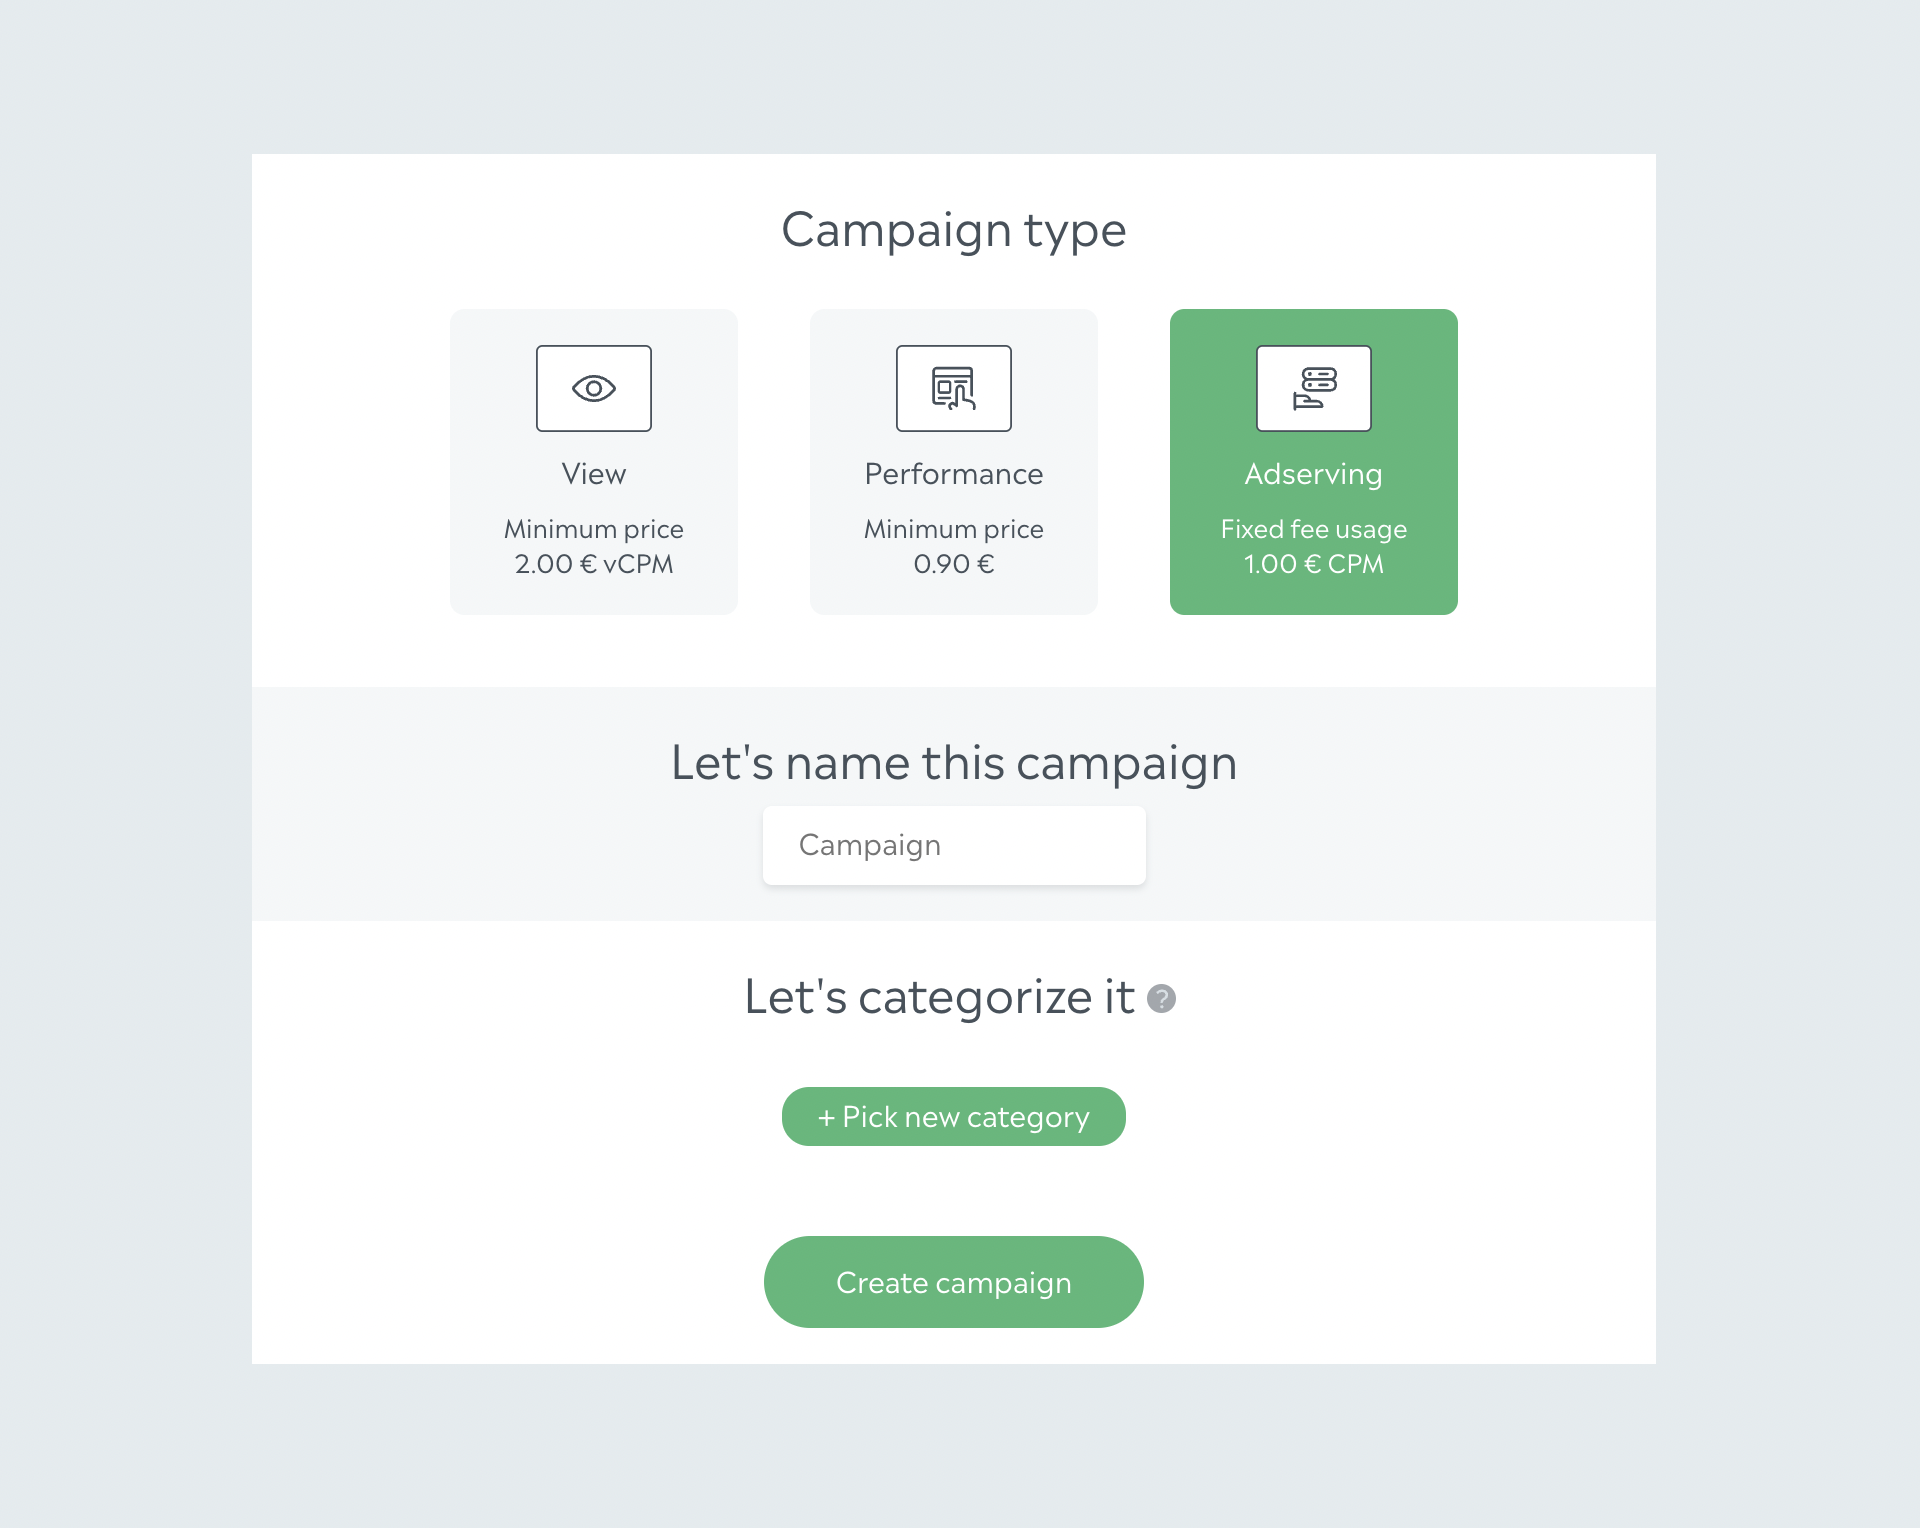
👆 Adserving campaigns are billed on a CPM-based fixed usage fee (and not vCPM).
When you enter the campaign setup, you will find some fields that can still be filled for these campaigns:
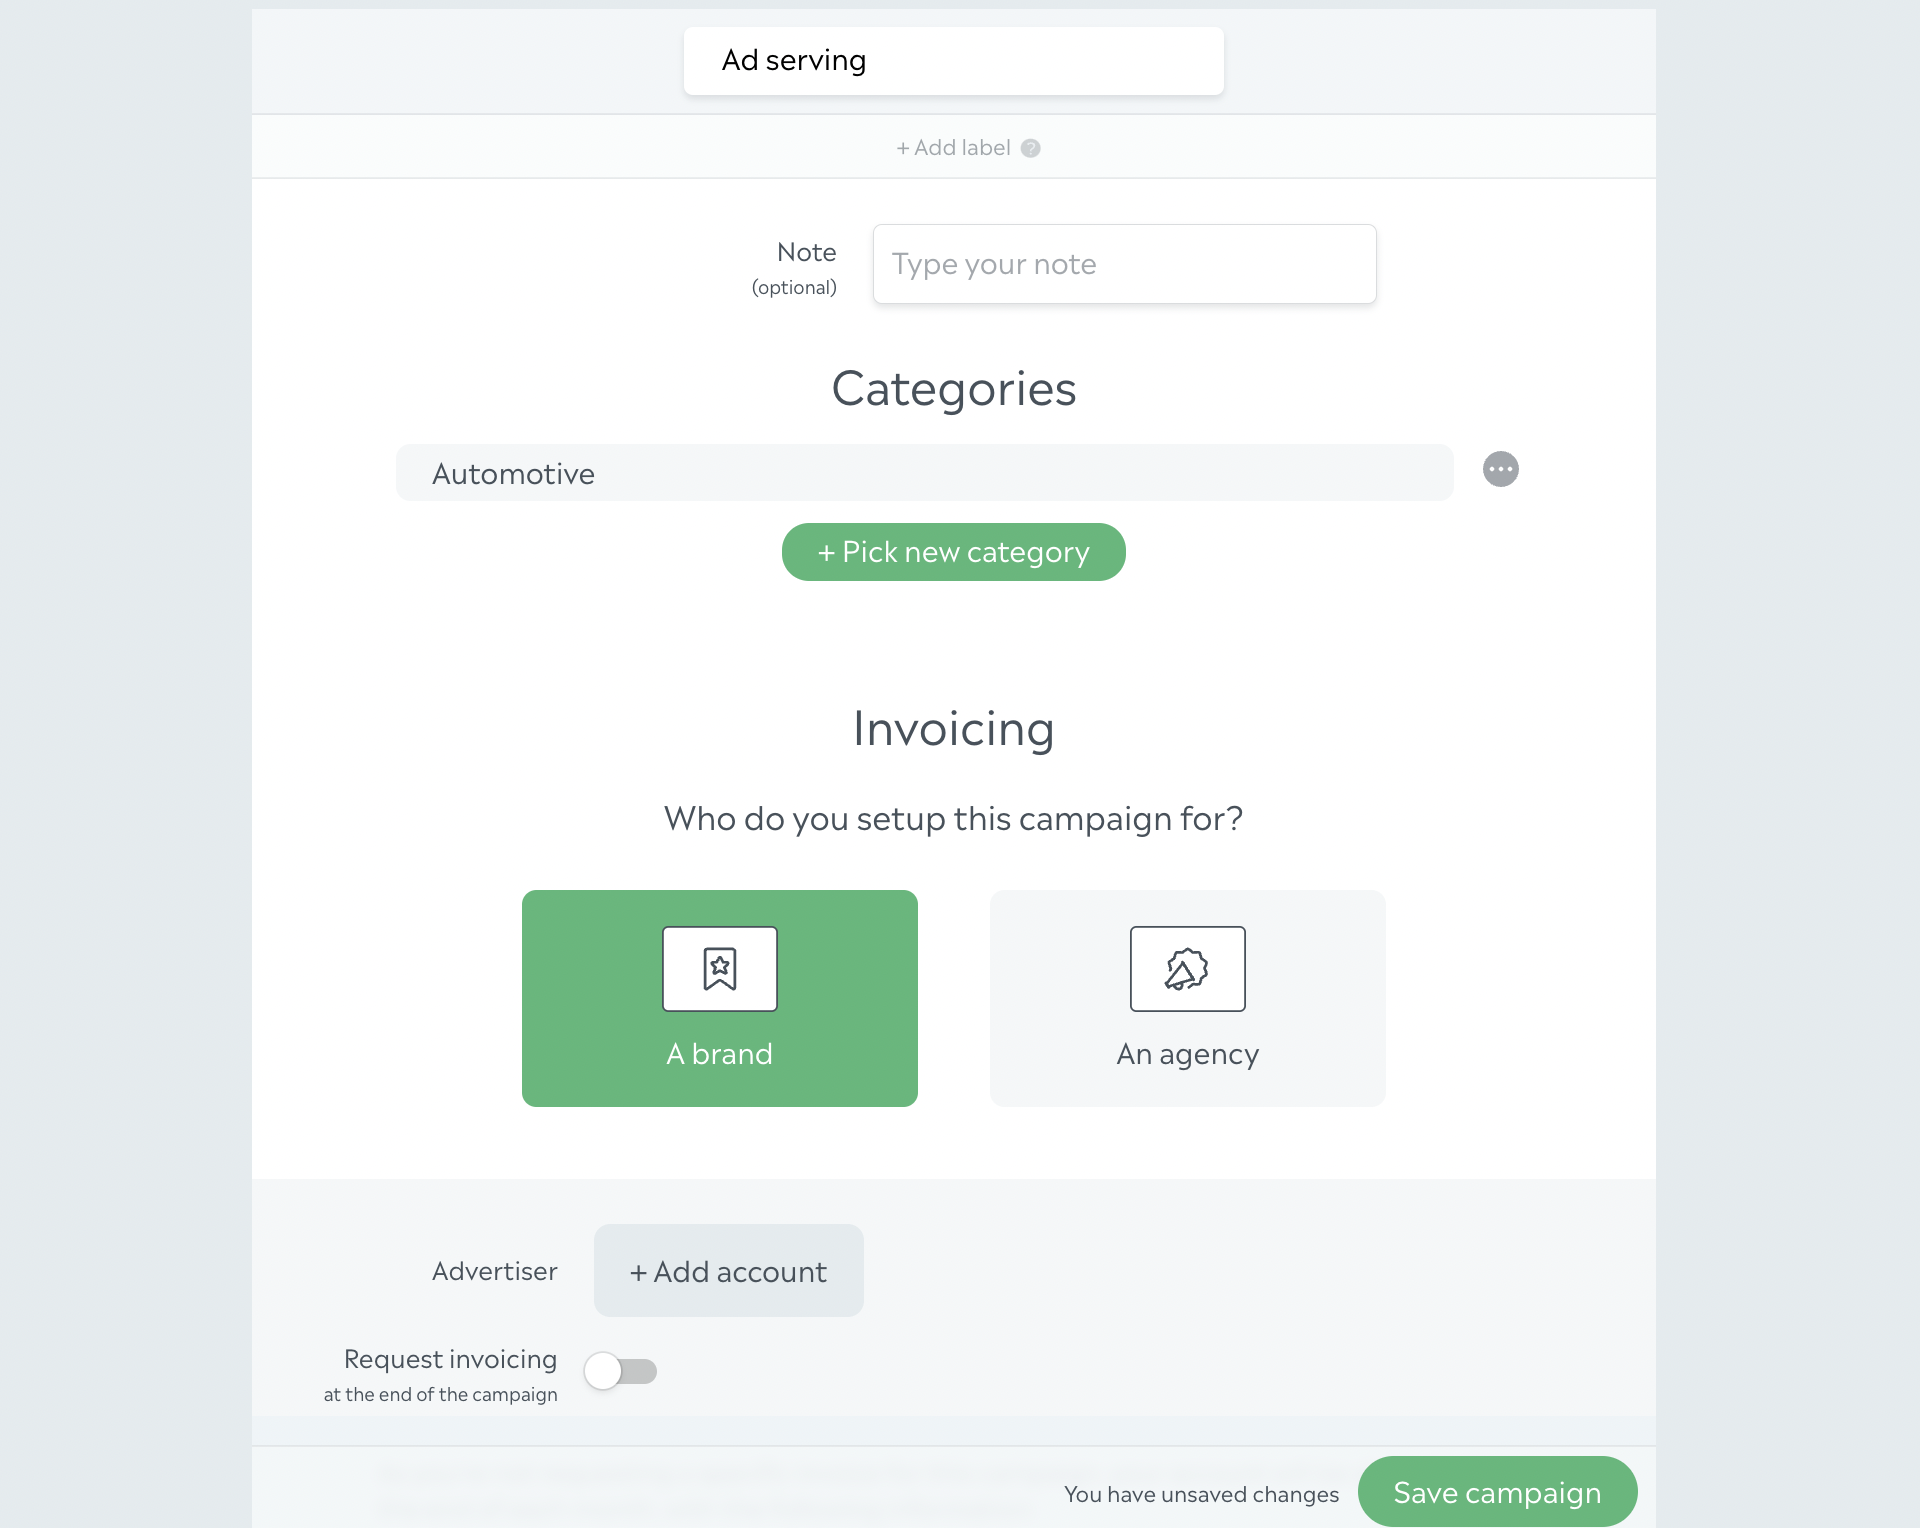
👆 you are able to set the campaign category and the invoicing information needed for you and your finance team

👆 if your team does have Sellers and AdOps, you can use the attribution function. You also have a reminder of the pricing information, CPM based on the Impression event
![]()
👆 if you are in advanced mode, you can create insertions, then add creatives into these ones. If you are in a simple mode, you will be able to directly add creatives into your campaign. You are still able to attach trackings into your campaign. The new part of the campaign editor is the Script part. More details below.
Get the script#
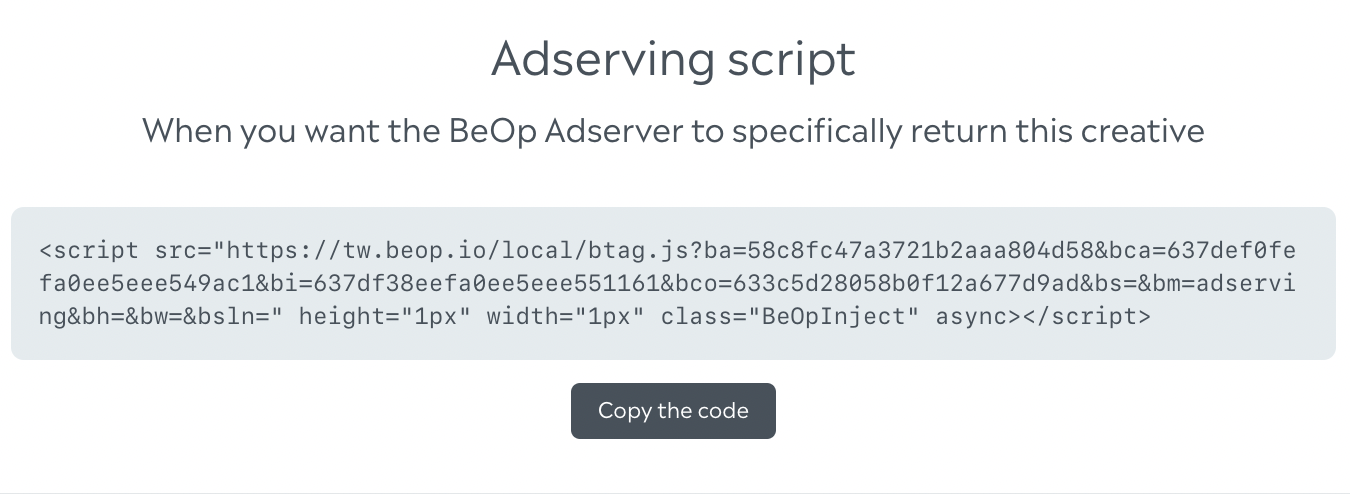
If you are on campaigns or insertions, you will find that short HTML script tag that you can just copy and paste in your favorite ad server / DSP. This tag can be inserted in the majority of external buying interfaces.
There is a logic in these scripts
- If you take the script on the campaign level, the server will render a random insertion and a random creative from that campaign
- If you take the script on the insertion level, the server will render a random creative from that insertion from that campaign
- If you take the script on the creative level, the server will render that specific creative from that insertion from that campaign
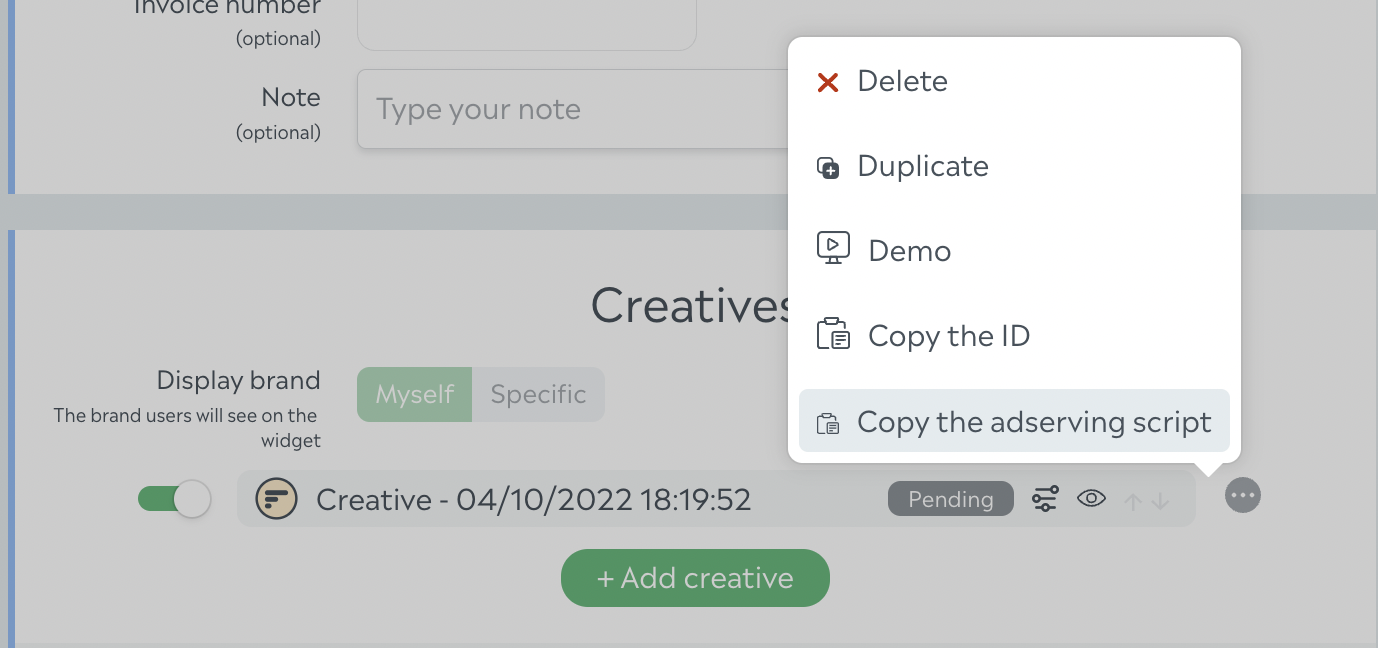
Warning: don't forget to save a first time your insertion so the script you're about to copy contains the relevant insertion ID
Additional information: you can also copy the script using the end of line action buttons 👇
Click tracking#
Adding Your Own Click Tracker URL in the BeOp Script#
With BeOp, you have the option to integrate your custom Click Tracker URL into the script. This feature allows you to track user interactions with BeOp ads more effectively.
How It Works:#
- Automated Click Tracking (Optional): BeOp provides an automated way to track clicks with the ${CLICK_URL_ENC} macro in the script. This macro is recognized by the majority of classic DSPs such as DV360, Xandr, ... to automatically generate a Click Tracker URL for you and collect precious information about click metrics in your favorite buying platform. If you choose to use this, there's no need to modify the script further.
- Custom Click Tracking (Advanced): If you prefer, you can opt for custom click tracking by adding your Click Tracker URL after the '&clk=' parameter in the script. This allows you to have full control over click tracking and to adapt to all situations, even the most custom ones.
User Interaction Flow:#
- When a user clicks on a BeOp ad, the BeOp SDK will either use the automated Click Tracker URL (with ${CLICK_URL_ENC}) or your custom Click Tracker URL, depending on your preference.
- The BeOp SDK will append BeOp's final redirect URL to the end of your Click Tracker URL (automated or custom). This redirect URL is encoded for security purposes.
- The user is then redirected to your Click Tracker URL with BeOp's redirect URL already added.
- BeOp expects that the user is redirected to the BeOp's final redirect URL at the end of the workflow.
Warning of use: You have the freedom to choose between automated or custom click tracking, depending on your needs and preferences. If you decide to use your custom Click Tracker URL, ensure that it can accept a URL as a parameter and perform a redirection to that URL. This allows you to tailor click tracking to your specific requirements.
Of course, you can choose to not use click tracking at all. In that case, you can just let the '&clk=' parametter empty.